Follow the steps below to manually back up your website and download it to your computer.
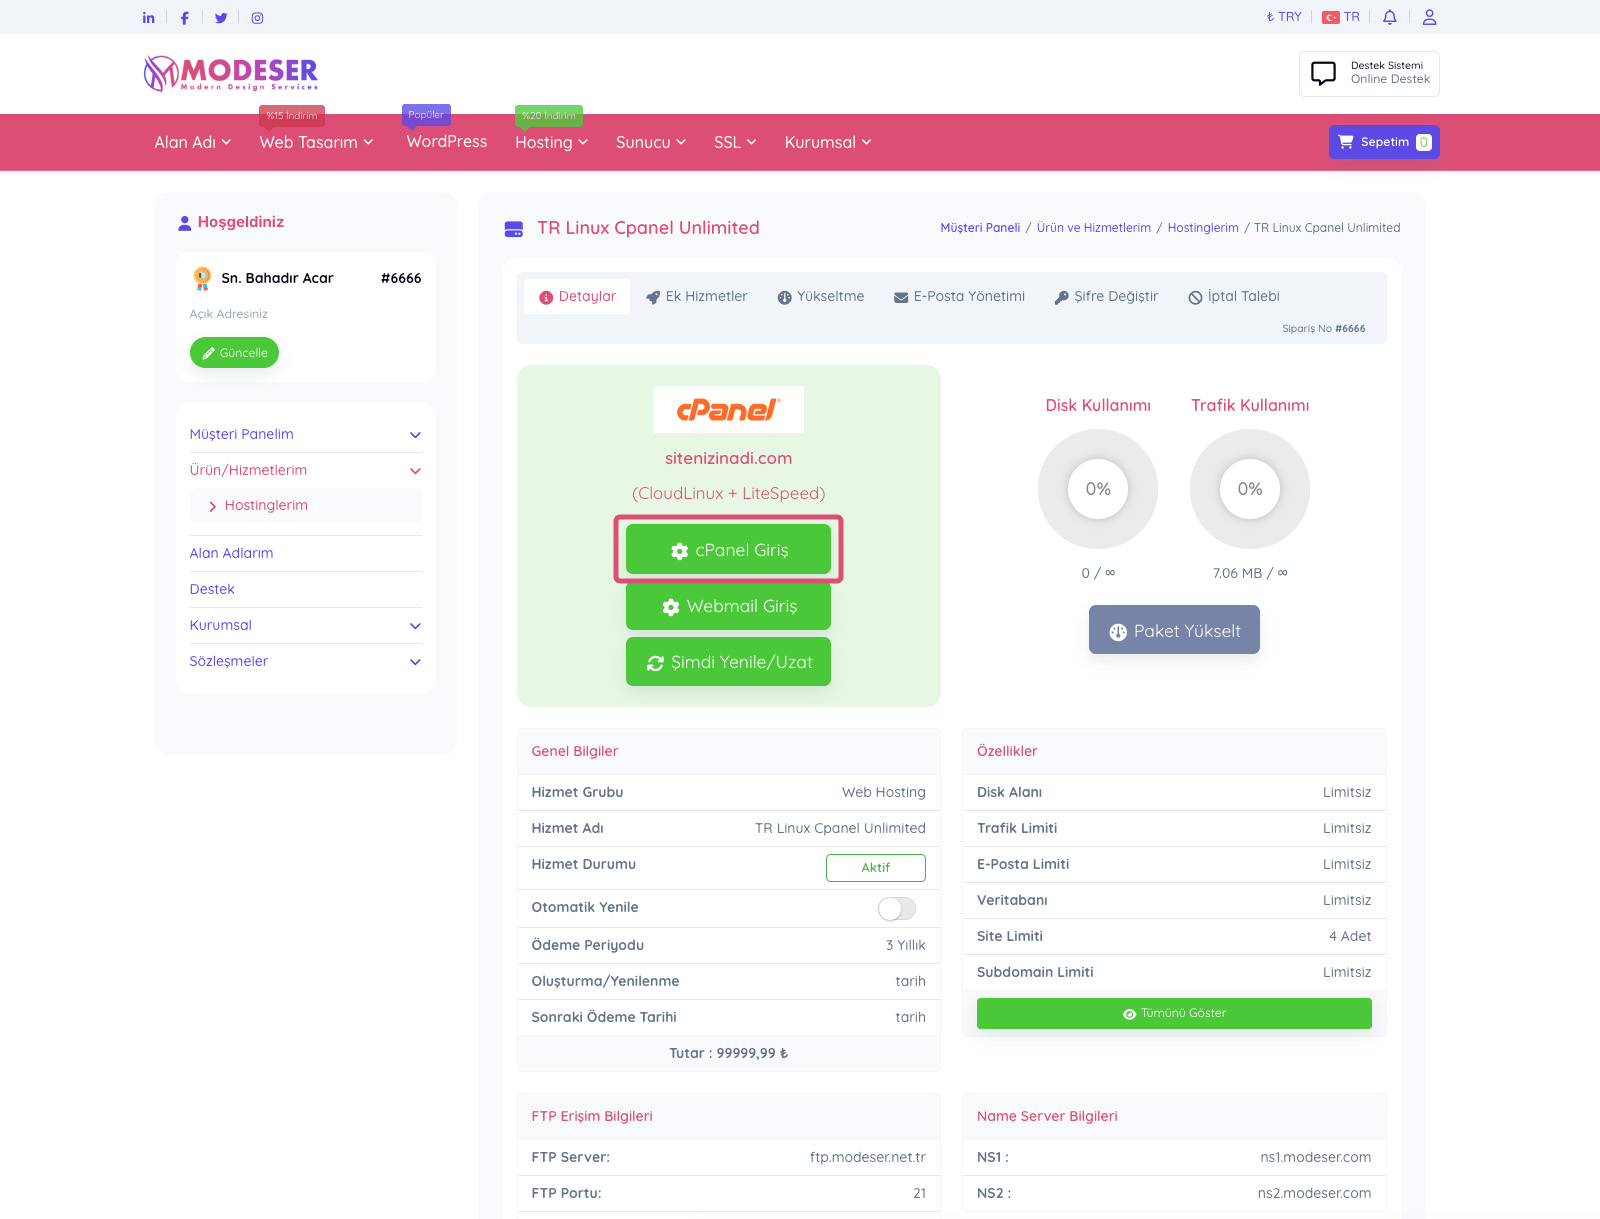
After logging into your customer panel, click on the green area labeled "Products / Services". On the page that opens, click the "Manage" button on the line of the hosting service for the site you will back up. When you click this button, the screen shown in the image below will open. On this screen, click the "cPanel Login" button marked in the image. You will be redirected to your cPanel account.
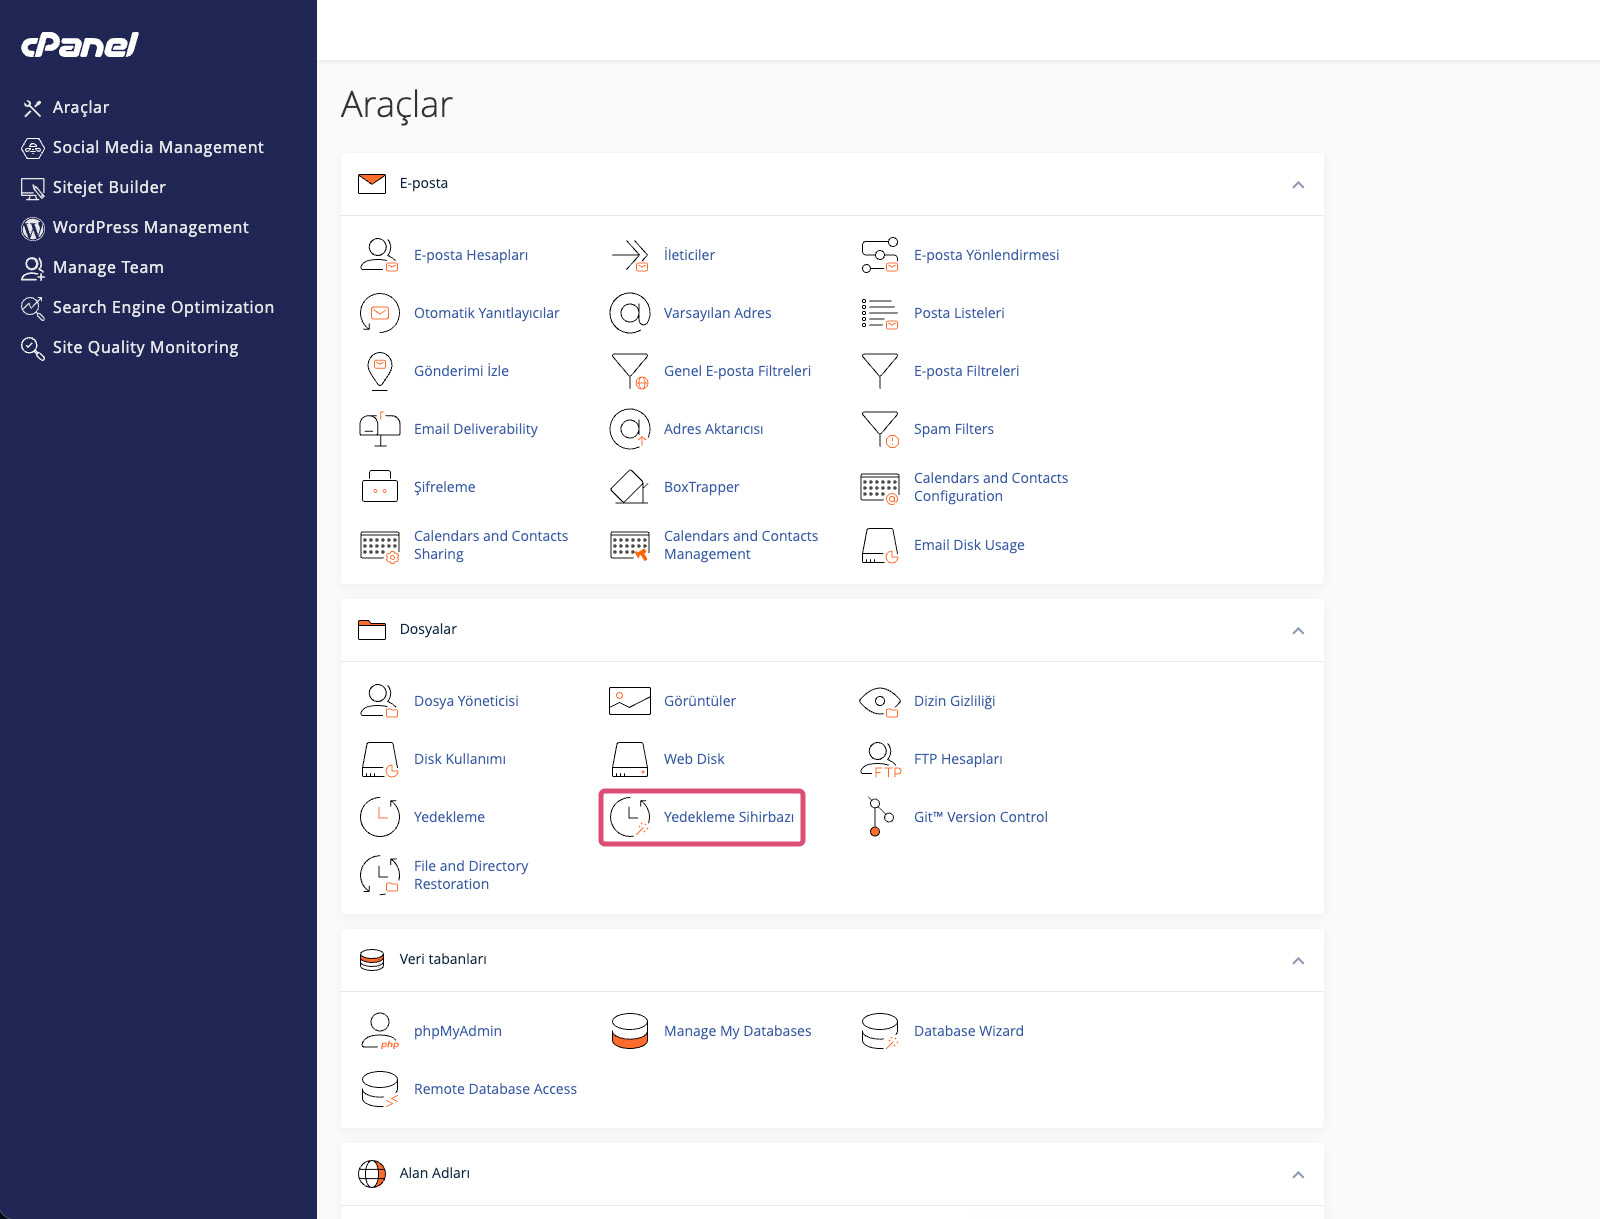
On your cPanel account page that opens, click on the "Backup Wizard" highlighted in the image below.
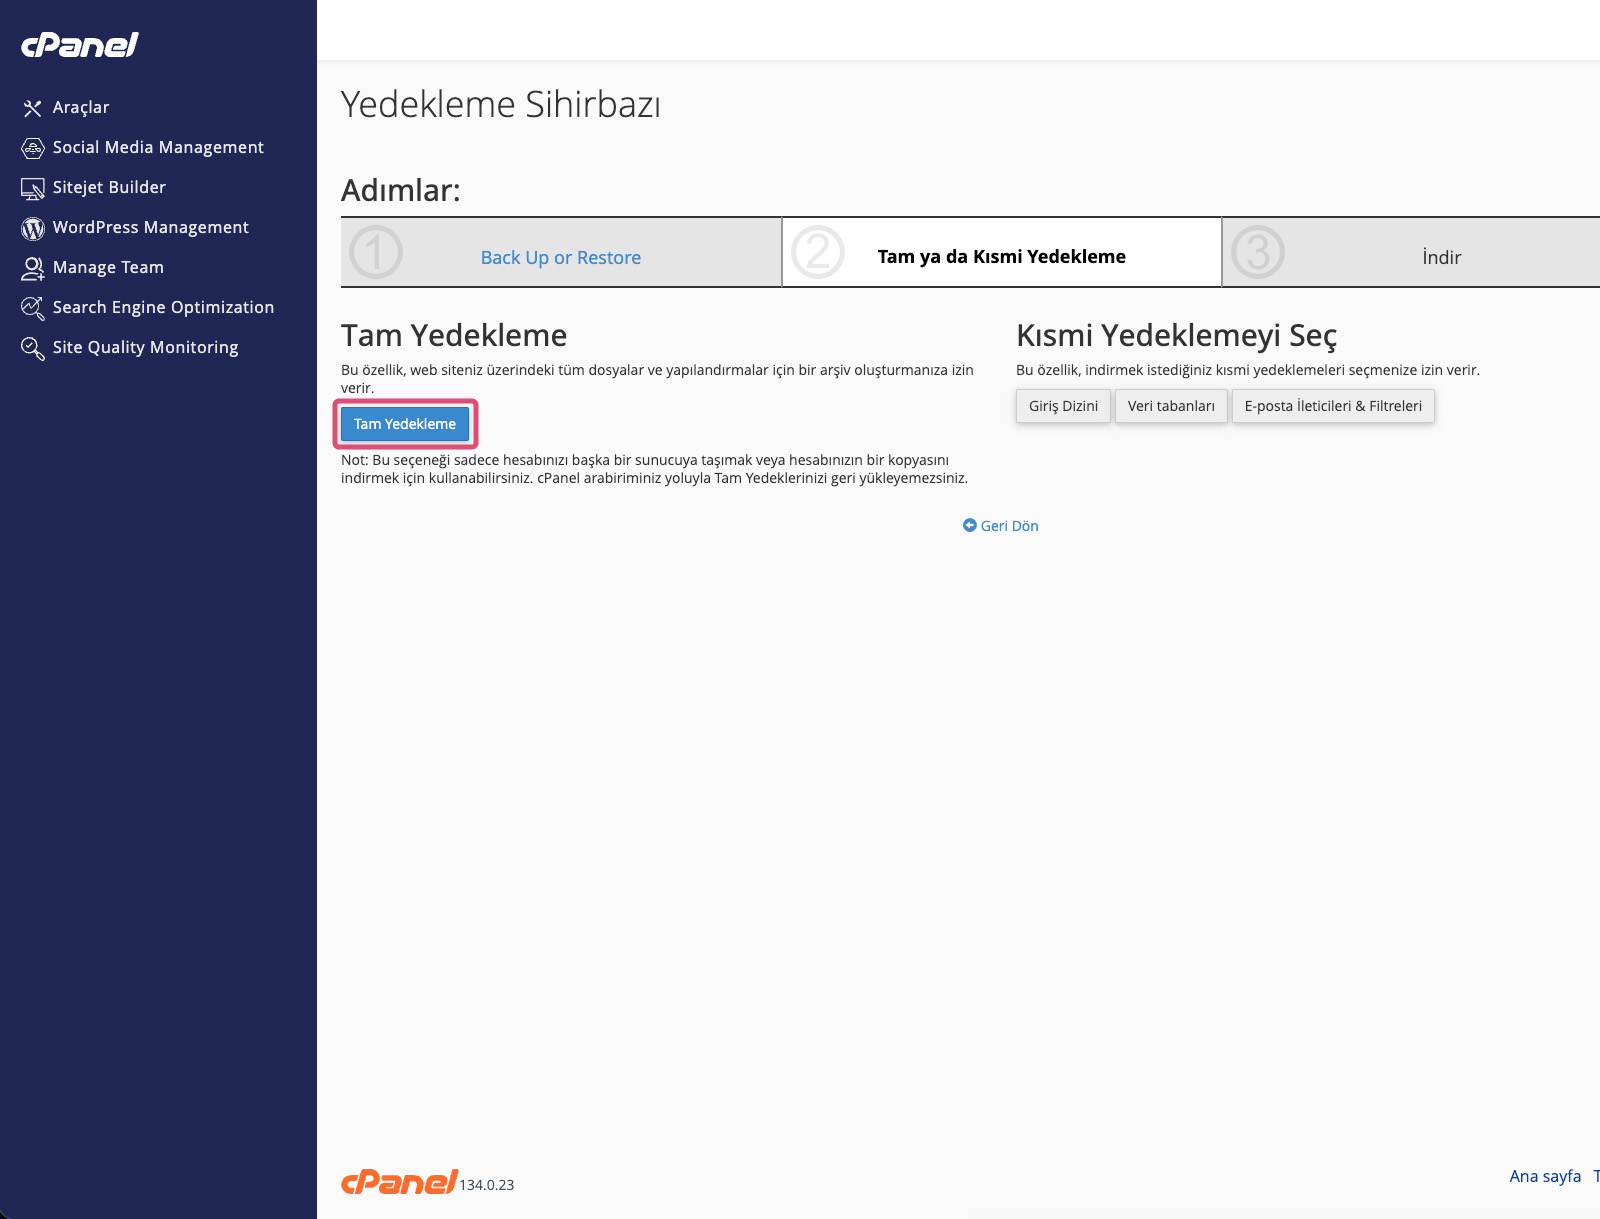
On the page that opens, click the "Full Backup" button highlighted in the image below.
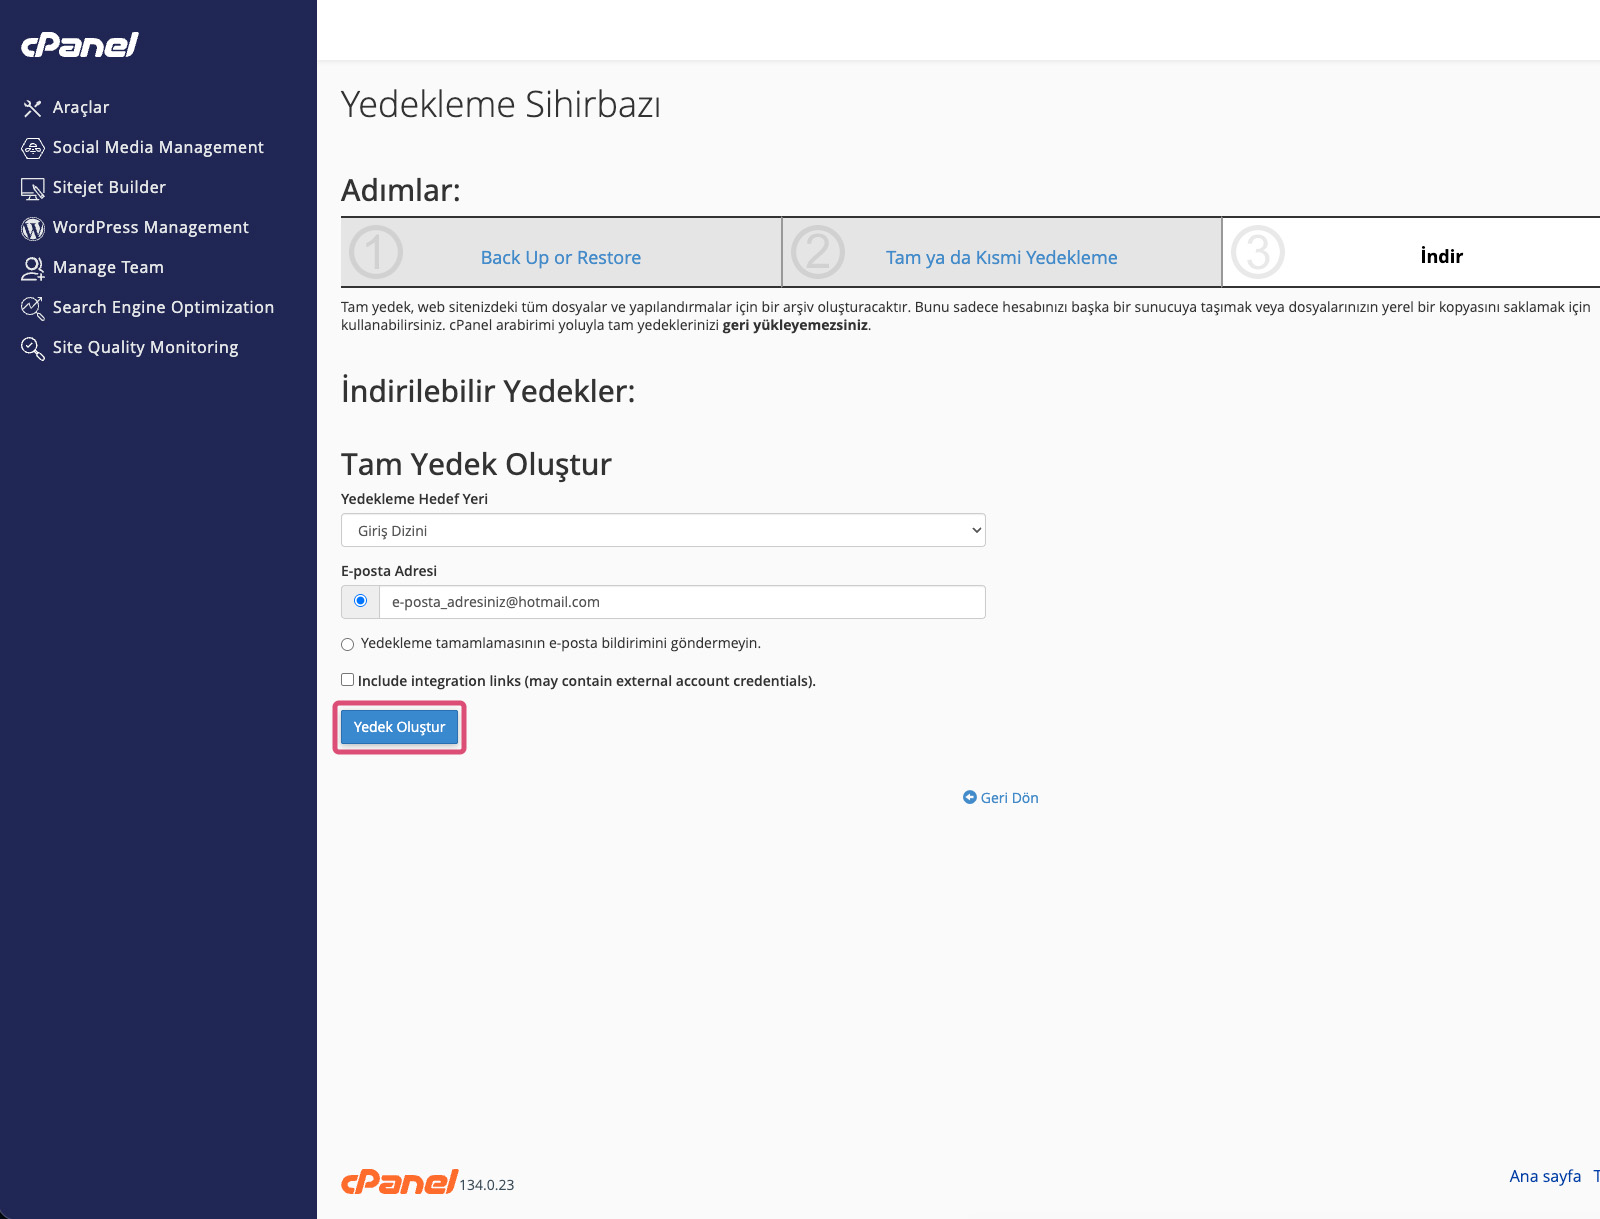
On the next screen, click the "Generate Backup" button highlighted in the image below.
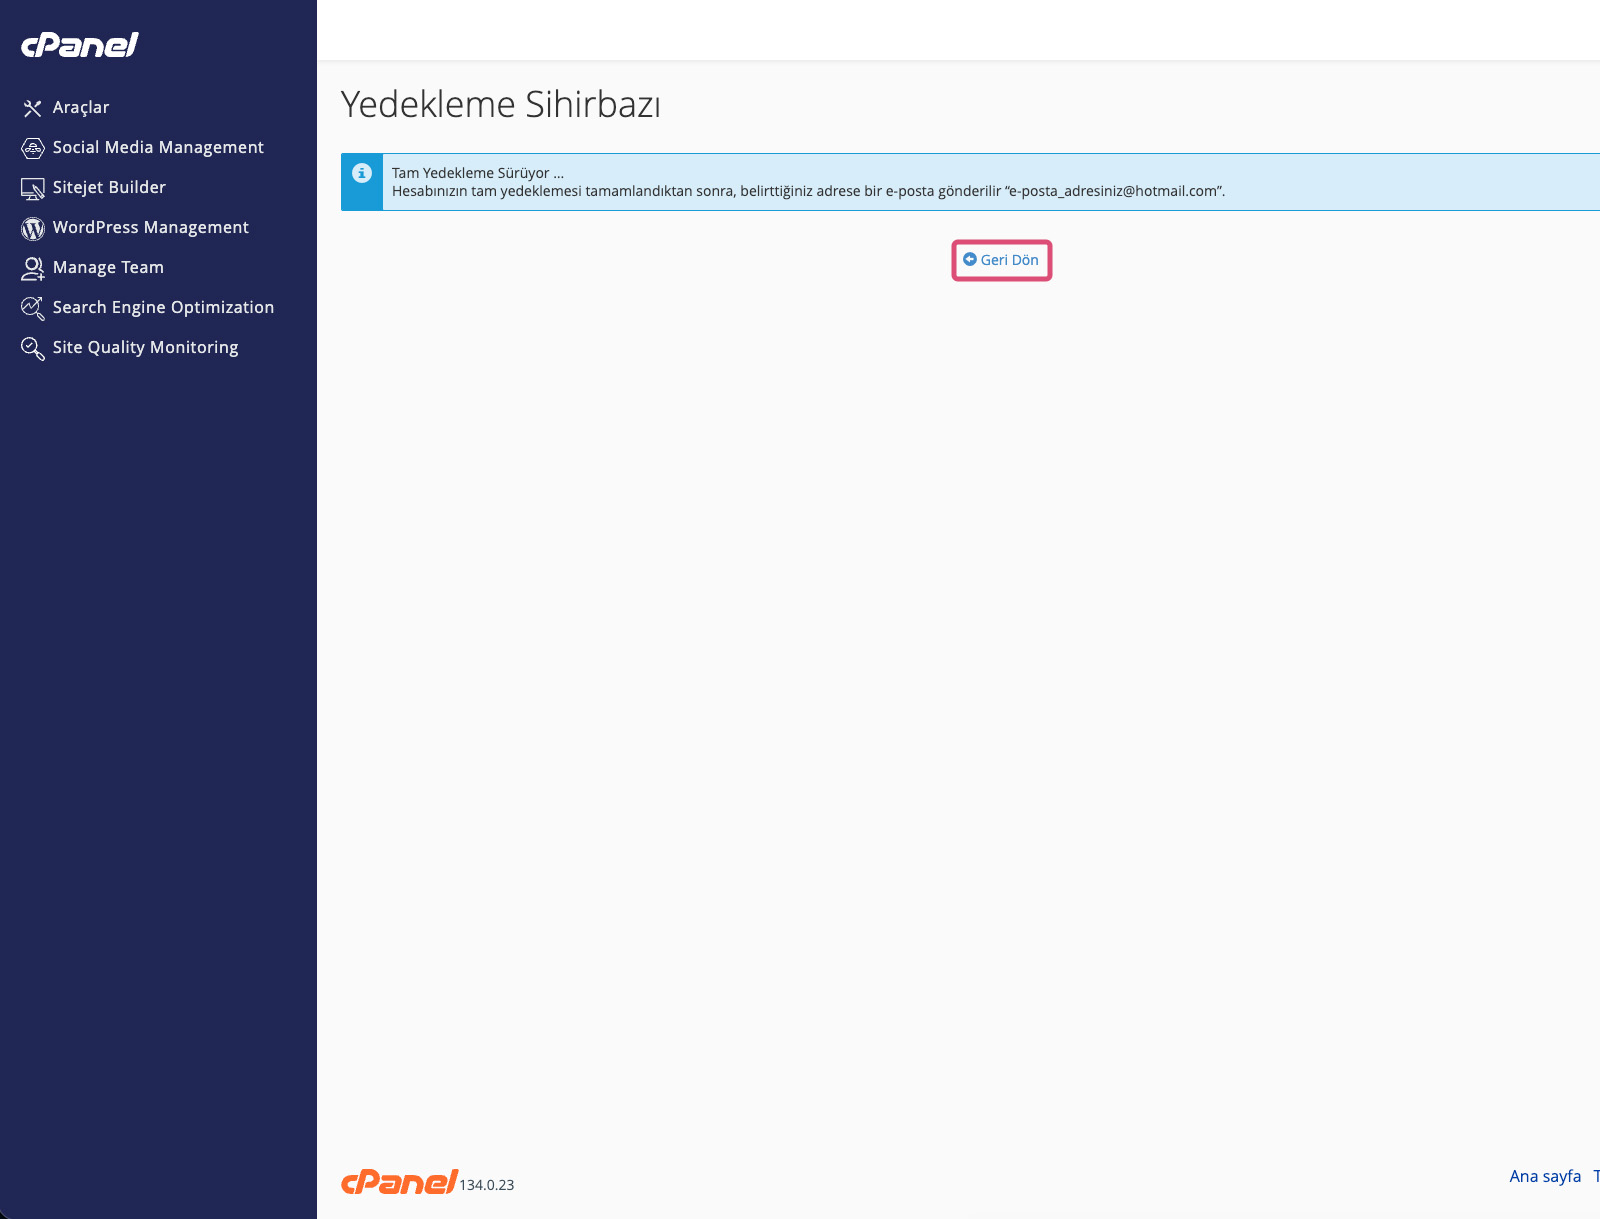
On the next screen, click the "Go Back" link highlighted in the image below.
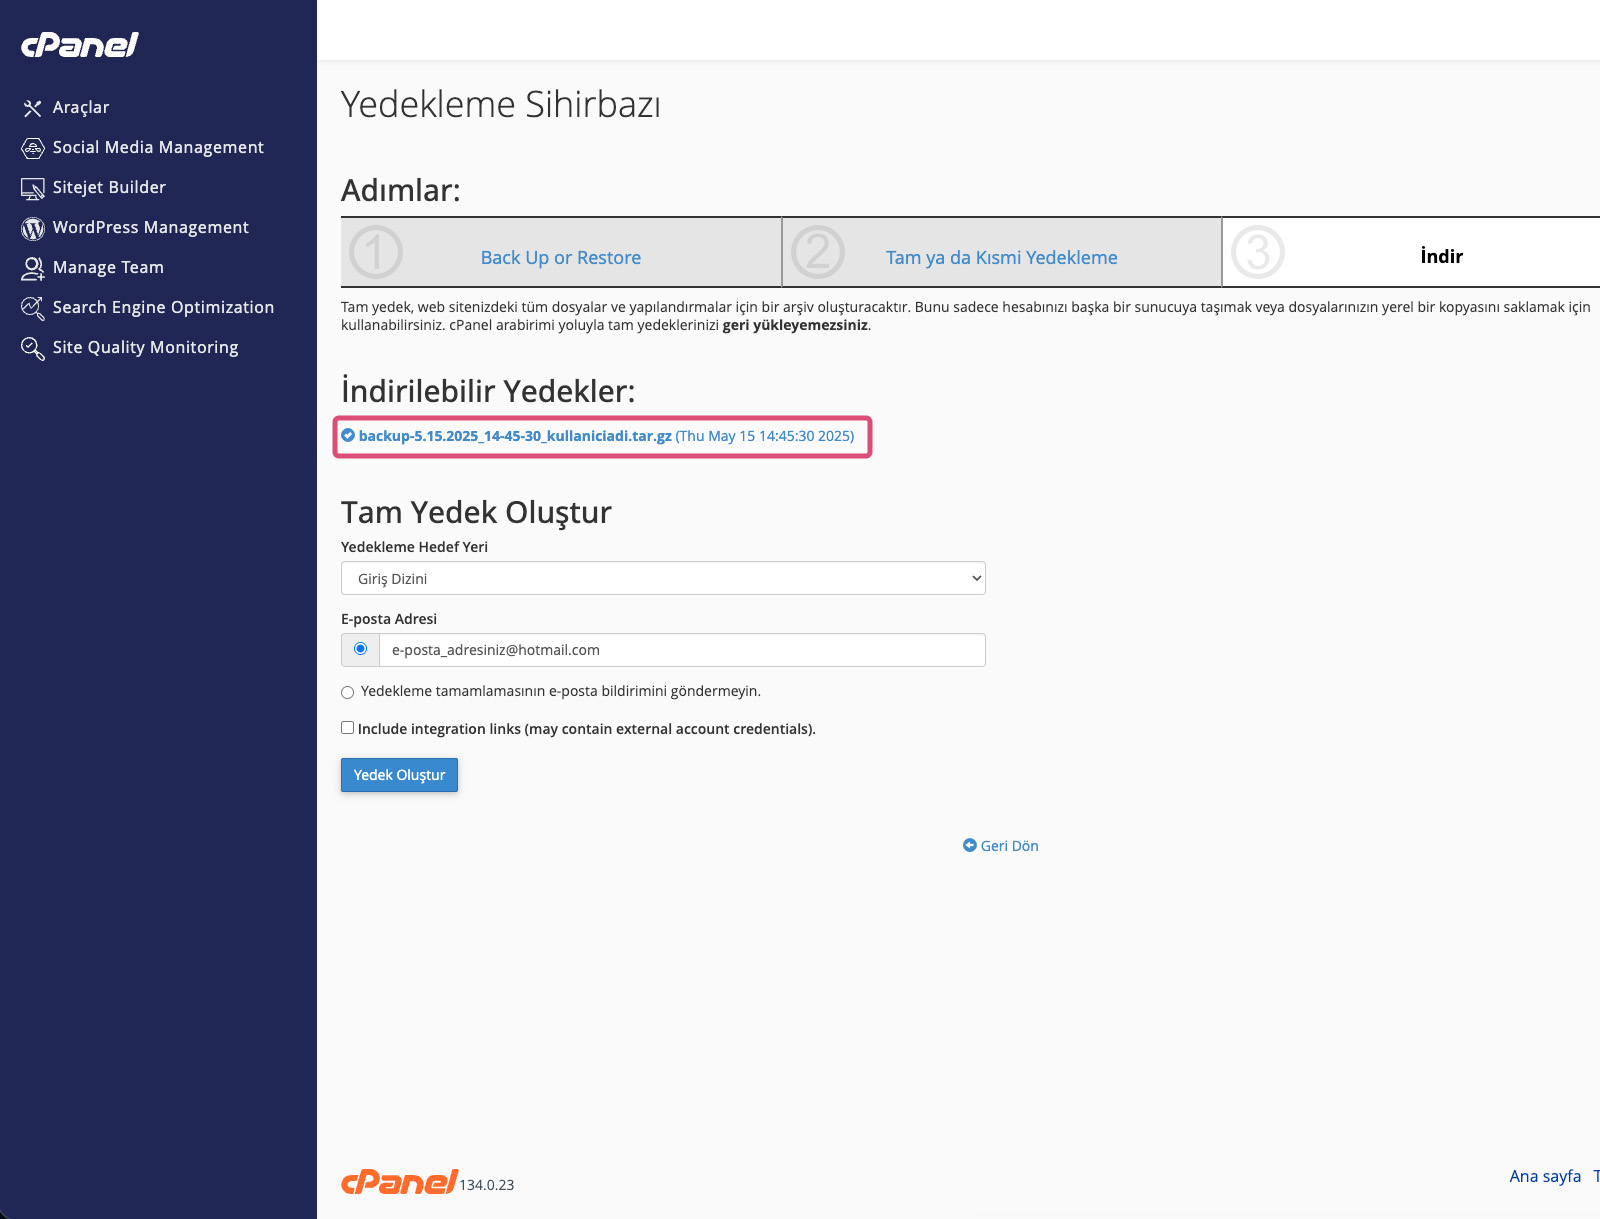
On the page that opens, wait for your backup to complete by refreshing the page every 5 minutes until the indicator on the left side of your backup looks like the one shown in the image. Backup time may vary depending on your website’s file size. Please be patient during this process. Once completed, click on it to download it to your computer.
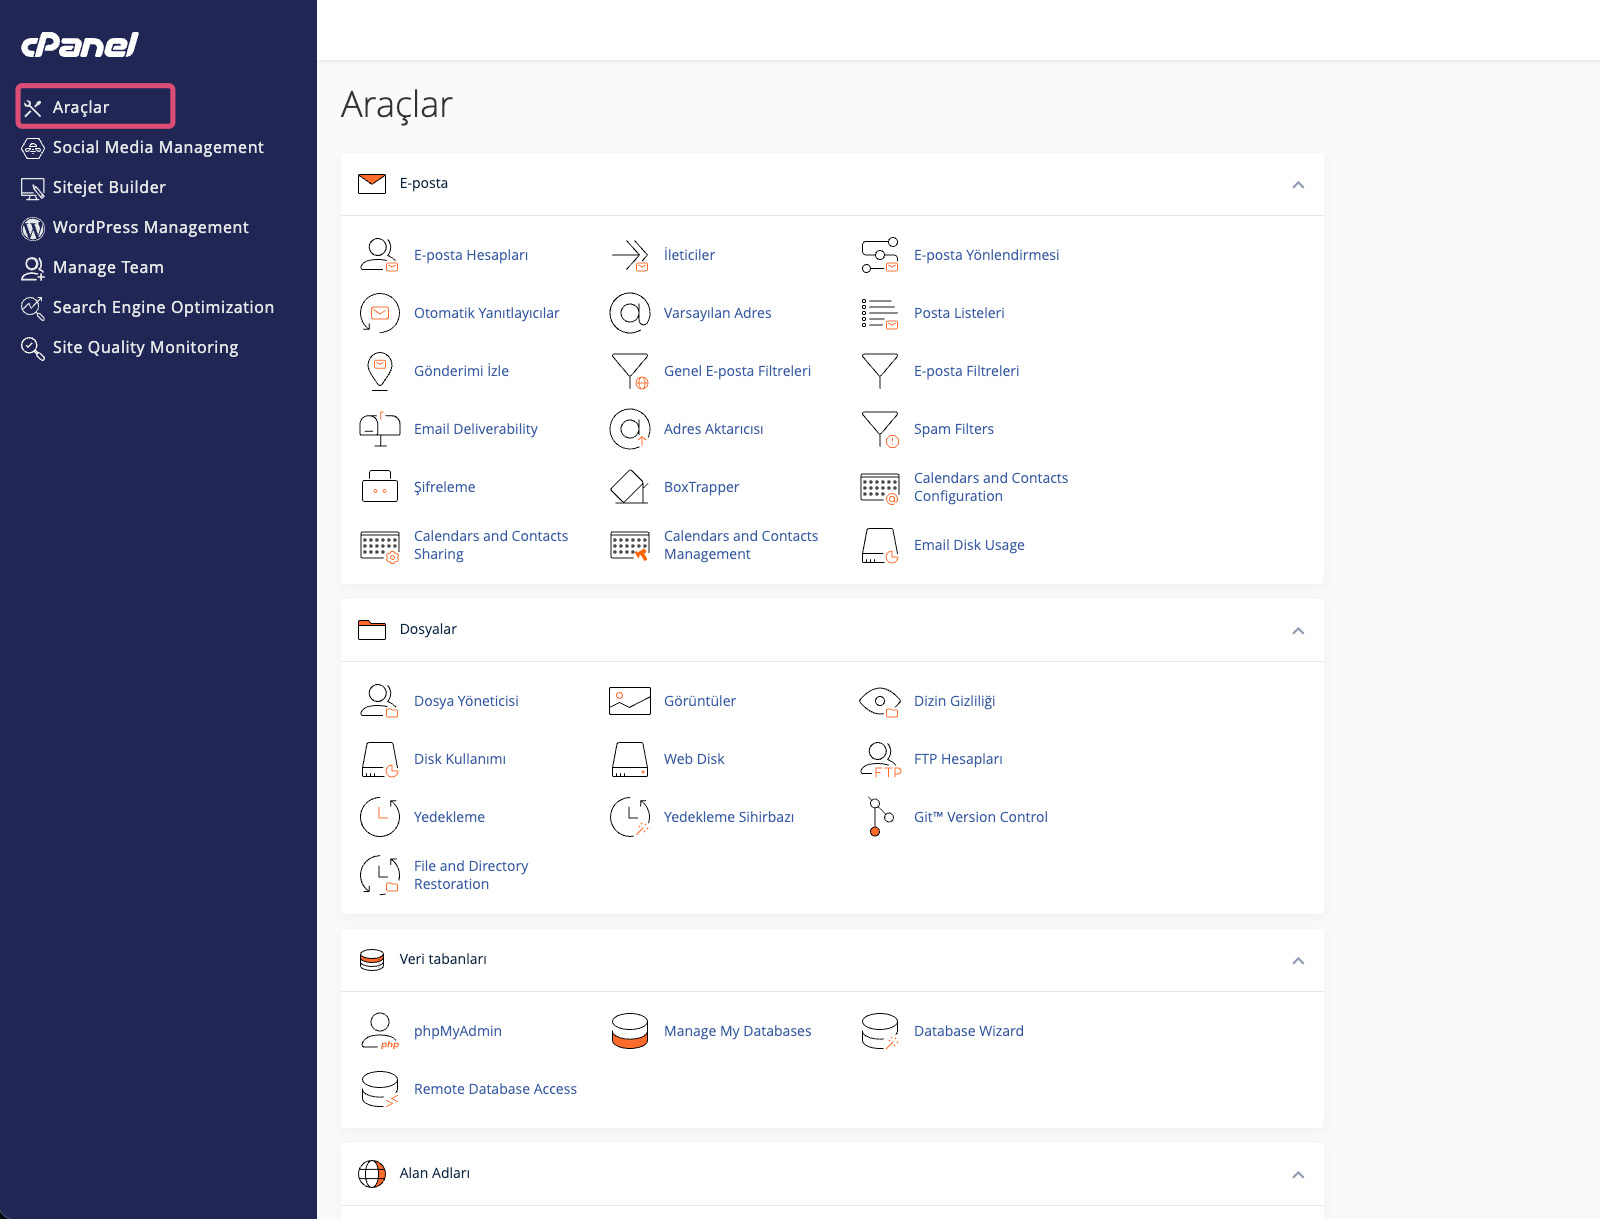
You have completed backing up and downloading your website. The following steps are optional. After downloading, it is recommended to delete the backup from your hosting account. Otherwise, it will occupy disk space and consume your hosting limits. To delete the backup, first click on the "Tools" menu highlighted in the image below.
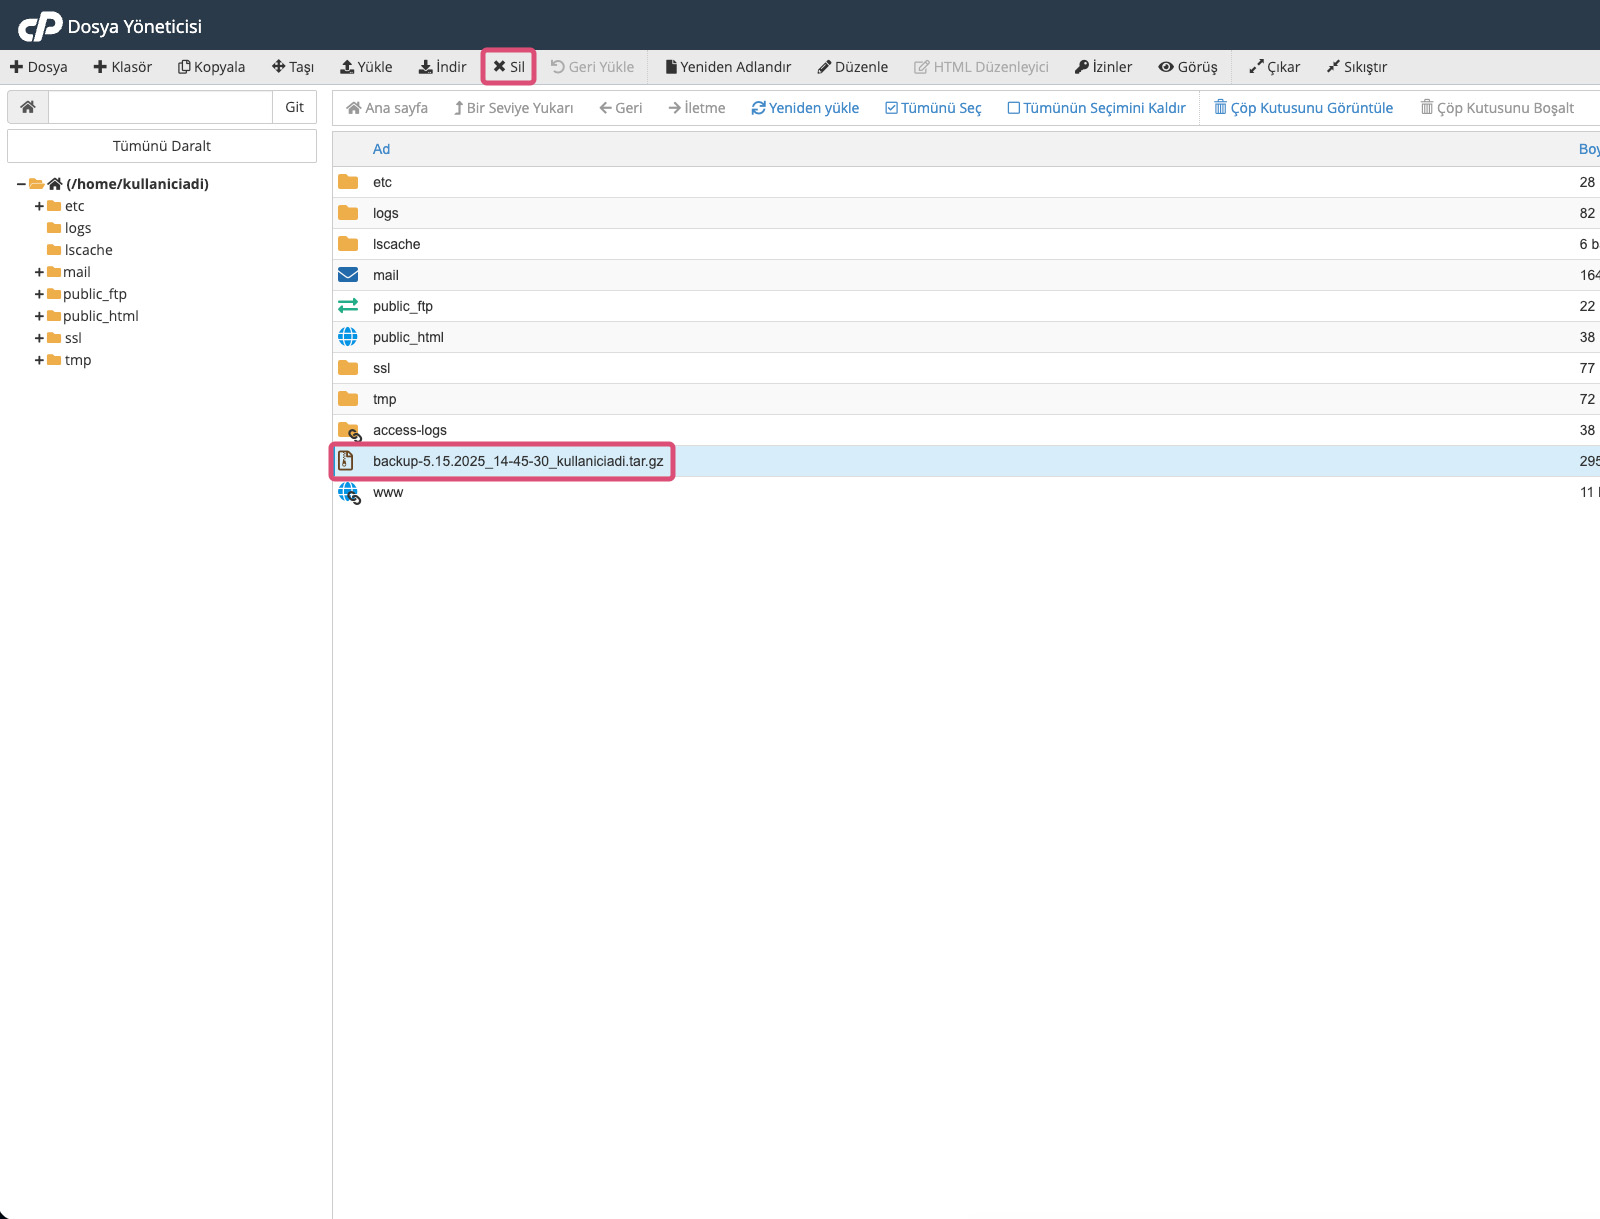
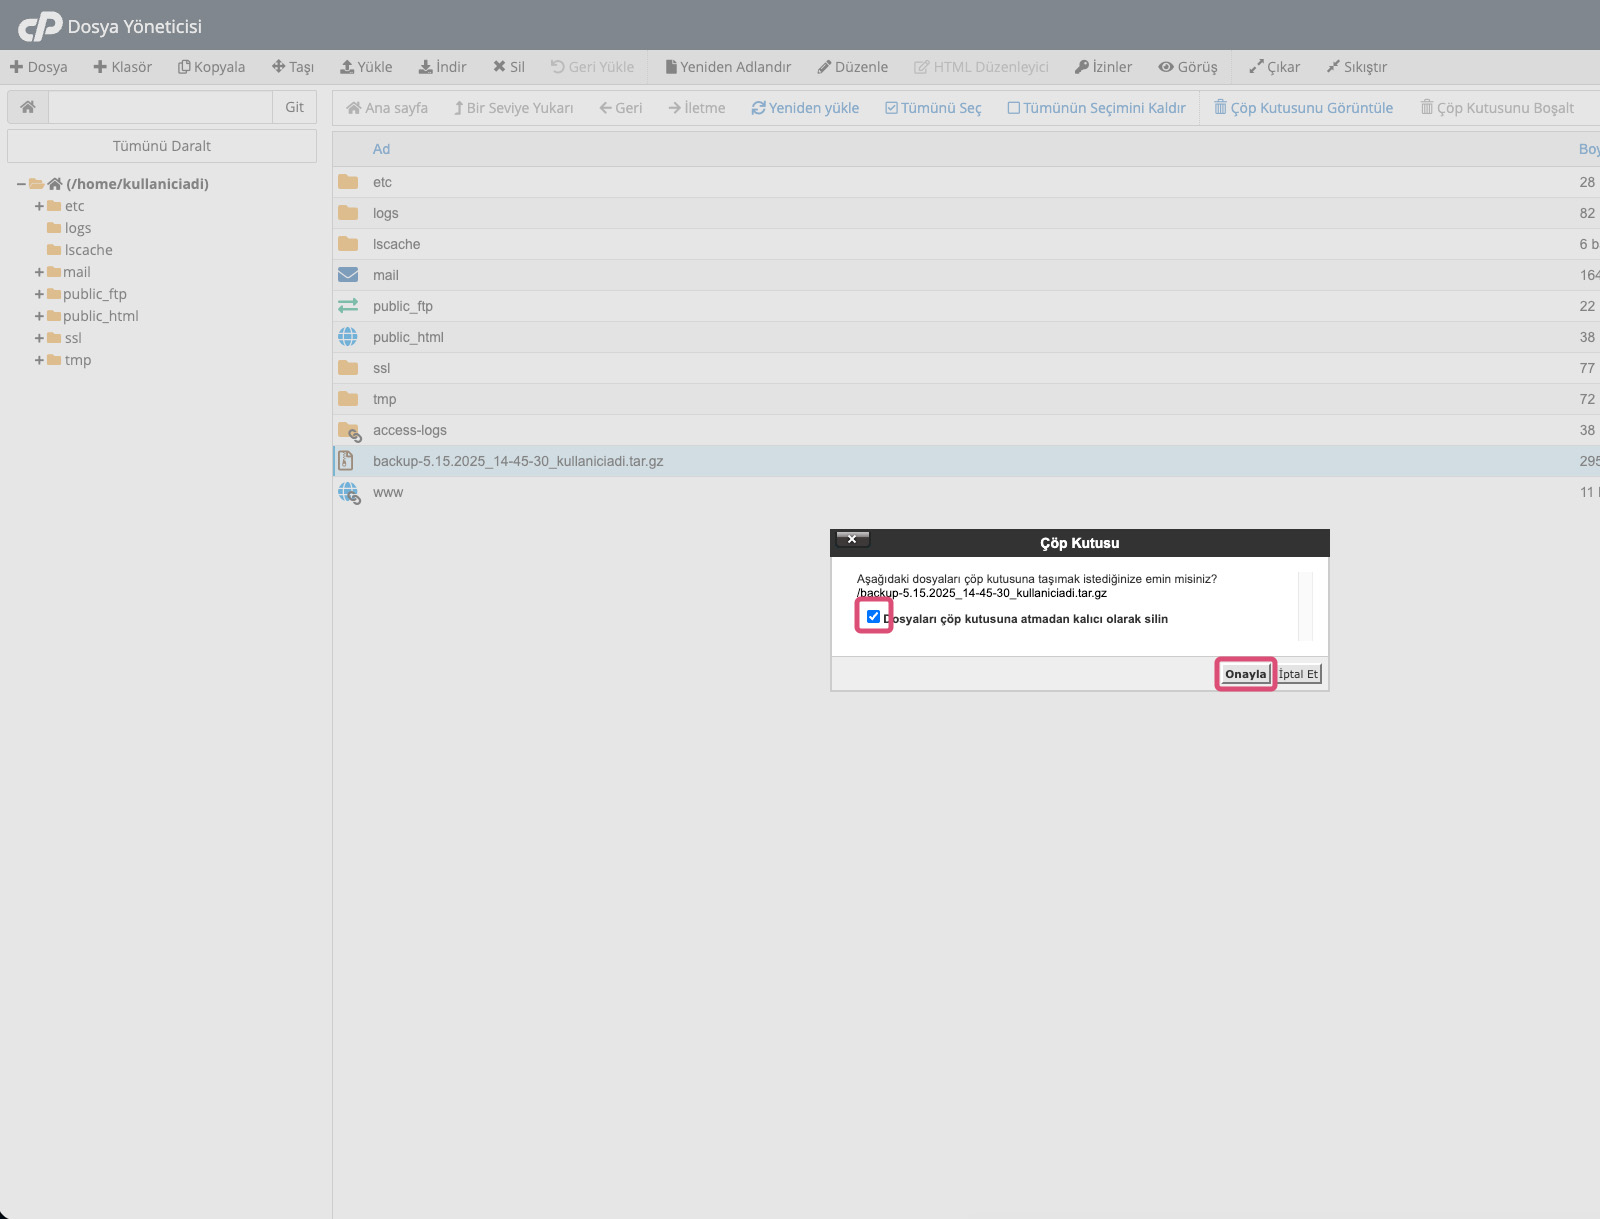
On the page that opens, click on the "File Manager" section under the "Files" category. The File Manager tab shown in the image below will open. Make sure you select only your backup file. If you select other files or folders, they will also be deleted. Selected items will be highlighted in light blue as shown in the image. WARNING: DO NOT SELECT ANY FILES OR FOLDERS OTHER THAN YOUR BACKUP FILE.Deleting other files may cause your website to stop working. After selecting your backup file, click the "Delete" menu highlighted below.
On the confirmation page, the system will show which file will be deleted. If only the backup file starting with "backup-" is listed, confirm the option "Delete permanently without moving files to trash" and then click the "Confirm" button.
Congratulations!
You have now successfully created a backup of your website, downloaded it to your computer, and removed the backup file from your hosting account to free up disk space.